4-in-1 cribs offer lasting value, adapting from infancy through childhood, simplifying furniture needs and providing a secure, evolving sleep space for your little one․
What is a 4-in-1 Crib?
A 4-in-1 crib is a versatile piece of baby furniture designed to grow with your child․ Initially functioning as a standard crib for infants, it cleverly converts into a toddler bed, then a daybed, and ultimately a full-size bed with the addition of a conversion kit․ This adaptability eliminates the need to purchase separate beds as your child develops, offering significant long-term value and convenience for parents seeking a streamlined nursery solution․
Benefits of Choosing a 4-in-1 Crib
Opting for a 4-in-1 crib delivers substantial cost savings by reducing the need for multiple bed purchases․ Its adaptable design ensures a consistent sleep environment as your child grows, promoting better sleep habits․ Furthermore, these cribs often boast durable construction and timeless styles, seamlessly integrating into evolving nursery décor, offering both practicality and aesthetic appeal for years to come․
Unboxing and Inventory
Carefully unpack all components and compare them against the included parts list to ensure everything is present before beginning assembly, avoiding delays․
Checking the Parts List
Begin by thoroughly reviewing the provided parts list, typically found within the instruction manual or on a separate sheet․ Carefully cross-reference each item depicted on the list with the physical components you’ve unpacked․ Note quantities and specific identifiers – like part numbers or letters – to avoid confusion during assembly․ Missing parts can halt progress, so address discrepancies immediately by contacting the manufacturer or retailer․ A complete inventory upfront saves time and frustration later on․
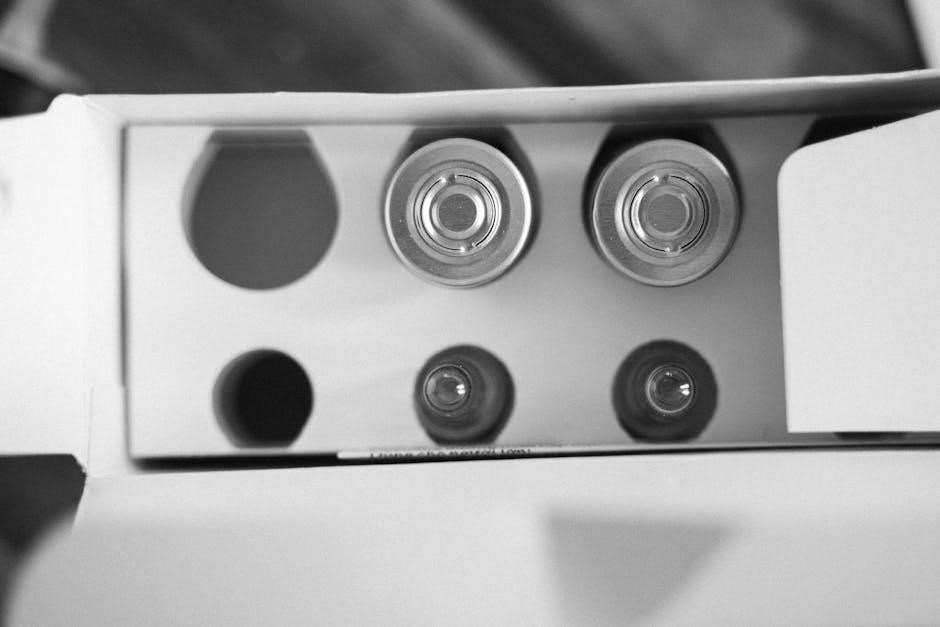
Identifying Hardware Components
Hardware often arrives in labeled bags, but double-check against the parts list to confirm each screw, bolt, washer, and dowel’s purpose․ Distinguish between similar-looking fasteners – length and head type are crucial․ Organize components into separate containers to streamline assembly․ Familiarize yourself with Allen wrenches or specialized tools included; these are vital for proper tightening․ Incorrect hardware can compromise the crib’s stability and safety, so precision is key․

Crib Assembly ― Stage 1: The Base
Begin by constructing the crib’s foundation, carefully attaching the legs to the side panels and ensuring a stable mattress support system is securely in place․
Attaching the Legs to the Crib Sides
Carefully align each leg with the designated corner of the crib side, ensuring the pre-drilled holes match up perfectly․ Utilize the provided bolts and washers, tightening them initially by hand to avoid stripping the threads․ Once all legs are loosely attached, use the Allen wrench to gradually tighten each bolt in a criss-cross pattern․ This ensures even pressure and a robust, stable connection․ Double-check all connections for firmness before proceeding to the next assembly stage, prioritizing safety and structural integrity․
Assembling the Mattress Support
Position the mattress support within the assembled crib frame, ensuring it rests securely on the designated ledges or brackets․ Attach the support using the appropriate screws or bolts, again tightening by hand first before utilizing the Allen wrench․ Verify the support is level and firmly secured, as this directly impacts mattress stability and infant safety․ Adjust the height if your crib allows, selecting a position appropriate for your baby’s age and developmental stage․
Crib Assembly ― Stage 2: The Crib Frame
Now, focus on building the complete crib structure by connecting the side rails and firmly attaching the headboard and footboard for stability․
Connecting the Side Rails
Carefully align the side rails with the pre-drilled holes on the crib legs and head/footboards․ Utilize the provided hardware – typically bolts and screws – to securely fasten each rail․ Ensure a flush connection, tightening each fastener incrementally to avoid warping․ Double-check alignment before fully tightening, guaranteeing a robust and stable crib frame․ Proper connection is crucial for safety and longevity․
Securing the Headboard and Footboard
Attach the headboard and footboard to the assembled side rails using the designated bolts and screws․ Confirm proper alignment with the base structure before tightening․ Incremental tightening is key to prevent stress fractures or misalignment․ Verify stability by gently rocking the assembled frame; any wobble indicates loose connections requiring re-tightening for a secure structure․

Converting to a Toddler Bed
Transitioning to a toddler bed involves removing crib sides and installing a provided guardrail, creating a safe, lower sleeping space for growing independence․
Removing Crib Sides for Toddler Configuration
Carefully detach the crib sides using the appropriate hardware – typically screws or bolts – as outlined in your crib’s manual․ Retain all hardware for potential future reconfigurations․ Ensure a stable base remains after removal․ Lower the mattress to its lowest setting to prevent accidental falls․ This creates a safe transition, offering a toddler-friendly sleeping environment while maintaining familiar surroundings․ Double-check all connections are secure before allowing a child to use the modified crib․
Installing the Toddler Guardrail
Securely attach the toddler guardrail to the designated slots on the crib frame, utilizing the provided hardware․ Ensure a snug fit, preventing gaps where a child could become trapped․ Confirm the guardrail is firmly fastened and doesn’t wobble․ This crucial safety feature prevents accidental roll-offs during sleep․ Regularly inspect the guardrail for looseness and re-tighten as needed, guaranteeing continued protection․

Converting to a Daybed
Transform the crib into a daybed by simply removing the toddler guardrail, creating an open and inviting space for lounging and daytime rest for your child․
Removing the Toddler Guardrail
To convert to a daybed, carefully detach the toddler guardrail․ Typically, this involves locating and unscrewing the bolts or latches securing it to the crib frame․ Ensure you have the correct tool readily available to avoid damaging the hardware or the crib itself․ Once detached, store the guardrail safely for potential future use when converting back to the toddler bed configuration․ Double-check all connections to confirm complete removal, creating a safe, open daybed structure․
Utilizing the Open Crib Frame as a Daybed
With the toddler guardrail removed, the crib transforms into a comfortable daybed․ Position a suitable mattress within the open frame, ensuring a snug and secure fit to prevent accidental falls․ Add pillows and bedding to create a cozy and inviting space for daytime relaxation or naps․ Regularly inspect the frame for stability and ensure it remains a safe environment for your child․

Converting to a Full-Size Bed
A conversion kit is essential for transforming the crib into a full-size bed, providing the necessary rails and support for a standard mattress․
Purchasing and Installing the Full-Size Bed Conversion Kit
Securing the correct kit is paramount; ensure compatibility with your specific crib model․ Most manufacturers offer dedicated kits, available directly or through retailers․ Installation typically involves attaching side rails to the existing headboard and footboard, creating a full-size bed frame․ Carefully follow the kit’s instructions, utilizing the provided hardware․ Double-check all connections for stability before introducing a mattress, guaranteeing a safe and secure sleep environment for your growing child․
Attaching the Headboard and Footboard to the Conversion Kit
Precisely align the headboard and footboard with the designated slots on the full-size conversion kit’s frame․ Secure them using the bolts and washers included in the kit, tightening firmly but avoiding over-tightening to prevent damage․ Ensure a flush and stable connection, as these components bear significant weight․ Re-verify all attachments before proceeding, prioritizing safety and structural integrity for long-term use․

Safety Considerations
Prioritize a firm, properly fitted mattress, secure crib placement away from hazards, and regularly inspect all components for stability and potential risks․
Mattress Fit and Firmness
Ensuring a proper mattress fit is paramount for infant safety․ The mattress should fit snugly within the crib frame, leaving no gaps exceeding two fingers wide to prevent entrapment․ A firm mattress is crucial; soft mattresses increase the risk of suffocation․ Always use a mattress designed specifically for cribs, adhering to safety standards․ Regularly check the mattress for any signs of wear or damage, and replace it if necessary to maintain a safe sleep environment for your child․
Crib Placement and Surroundings
Strategic crib placement is vital for a safe nursery․ Position the crib away from windows, cords, and potential hazards like heaters or wall decorations․ Maintain a safe zone around the crib, free from loose blankets, pillows, or stuffed animals․ Ensure adequate ventilation and a comfortable room temperature․ Regularly inspect the surrounding area for any newly introduced dangers, prioritizing a secure sleep environment for your baby․
Maintenance and Care
Regular upkeep ensures longevity and safety․ Consistent cleaning and hardware checks maintain the crib’s structural integrity, providing a secure and reliable sleep space․
Cleaning the Crib
Routine cleaning is vital for hygiene and longevity․ Use a mild soap and warm water solution with a soft cloth to wipe down all surfaces, avoiding abrasive cleaners that could damage the finish․ Pay close attention to areas prone to spills or drool․ Ensure the crib is completely dry before reassembling or allowing your baby to use it․ Regularly inspect for any buildup of grime or sticky residue, addressing it promptly to maintain a safe and sanitary sleep environment․
Tightening Hardware Regularly
Consistent hardware checks are crucial for maintaining crib stability and safety․ Over time, movement and use can loosen screws, bolts, and other fasteners․ Inspect all connections monthly, and tighten as needed using the appropriate tools․ Do not overtighten, as this could strip the screws or damage the wood․ A wobbly crib poses a significant risk, so diligence is key!

Troubleshooting Common Issues
Addressing assembly hiccups is normal․ Missing parts or difficult steps can occur; review instructions, check inventory, and contact the manufacturer for assistance promptly․
Missing Parts
Discovering missing components can halt assembly․ First, meticulously re-check the parts list against your delivered items, ensuring nothing is overlooked within the packaging․ If a part is genuinely absent, immediately contact the manufacturer’s customer support, providing your order details and the missing part’s identification number․ Many manufacturers will ship replacements quickly, minimizing delay․ Alternatively, explore online retailers specializing in crib parts, but verify compatibility before purchasing․
Difficulty with Assembly Steps
Encountering roadblocks during assembly is common․ Revisit the instructions, focusing on diagrams for clarity; sometimes a visual perspective helps․ Double-check that all previously assembled sections are correctly aligned and secured․ If still stuck, consult online forums or the manufacturer’s website for video tutorials or FAQs․ Don’t force connections – ensure proper alignment to avoid damage!

Understanding the Instructions
Deciphering instructions is key to success․ Pay close attention to diagrams and warning labels; clarity and accuracy are vital for safe and efficient assembly․
Decoding Diagrams
Crib diagrams are essential for visualizing assembly․ Carefully examine each illustration before proceeding, noting the orientation of parts and hardware placement․ Identify all components shown, matching them to the parts list․ Pay attention to arrows indicating direction and connection points․ Understand exploded views, which separate parts for clarity․ If a step seems unclear, revisit the diagram and consider different angles – a visual understanding prevents errors and ensures a sturdy, safe crib․
Interpreting Warning Labels
Warning labels are crucial for safe crib use․ Read each label thoroughly before, during, and after assembly․ Heed cautions about mattress fit, hardware tightness, and weight limits․ Understand potential hazards like entrapment or falls․ Never remove or obscure warning labels․ These labels aren’t suggestions; they are vital safety instructions designed to protect your child from serious injury․ Prioritize safety above all else․

Tools Required for Assembly
Essential tools include a Phillips head screwdriver and potentially an Allen wrench (often provided)․ A rubber mallet can aid assembly, ensuring parts connect securely․
Essential Tools
For successful assembly, a Phillips head screwdriver is absolutely crucial for tightening the majority of screws․ Many 4-in-1 cribs also require an Allen wrench, which is frequently included in the hardware package․ Having a rubber mallet proves beneficial for gently tapping pieces together, avoiding damage while ensuring a snug fit․ A level is also recommended to guarantee the crib is stable and safe for your baby․
Recommended Tools
To streamline the process, a power drill with a clutch setting can significantly speed up screw insertion, preventing over-tightening․ A soft cloth protects the crib’s finish during assembly․ Utilizing a tape measure ensures accurate component placement․ Work gloves offer enhanced grip and protect your hands․ Finally, a second person assists with holding larger pieces, making assembly safer and easier․
Assembly Time Expectations
Expect approximately 60-90 minutes for initial assembly, though complexity and experience levels vary; clear instructions and having a helper expedite the process․
Average Assembly Time
Generally, assembling a 4-in-1 crib takes between 1․5 to 2․5 hours․ This timeframe assumes one or two people are working on the project, and they possess a moderate level of DIY experience․ Factors like the crib’s design intricacy, the clarity of the included instructions, and the availability of all necessary tools significantly influence the overall completion time․ Taking breaks and carefully following each step are crucial for a successful build․
Factors Affecting Assembly Time
Several elements can extend or shorten assembly duration․ Complex designs with numerous parts naturally require more time․ Instruction clarity—or lack thereof—plays a huge role, as does missing or incorrectly labeled hardware․ An assembler’s experience level is key; novices will likely take longer․ Finally, having the correct tools readily available streamlines the process, while searching for them adds delays․

Finding Replacement Parts
Locating replacements involves contacting the manufacturer directly or exploring online retailers specializing in crib components, ensuring compatibility and continued safety․
Contacting the Manufacturer
Directly reaching out to the crib manufacturer is often the most reliable path for obtaining specific replacement parts․ Locate their official website or customer service contact information – typically a phone number or email address․ Be prepared to provide your crib’s model number, date of purchase, and a detailed description of the needed part․ Some manufacturers may require proof of purchase, so have that readily available․ They can confirm part availability, pricing, and shipping options, ensuring you receive the correct component for your 4-in-1 crib․
Online Retailers for Replacement Parts
Numerous online retailers specialize in baby furniture parts, offering a convenient alternative to contacting the manufacturer directly․ Websites like Amazon, eBay, and dedicated baby furniture parts suppliers often stock replacement hardware and components for various 4-in-1 crib models․ Always verify the part’s compatibility with your specific crib before purchasing, checking model numbers and dimensions carefully․ Read customer reviews to gauge the retailer’s reliability and part quality․
Warranty Information
Crib warranties typically cover manufacturing defects for a specific period; registration is crucial for valid claims, ensuring peace of mind and potential replacements․
Understanding the Warranty Coverage
Most 4-in-1 crib warranties safeguard against defects in materials and workmanship, not normal wear and tear․ Coverage periods vary, often ranging from one to five years from the original purchase date․ Carefully review the warranty document to understand what’s included – and excluded – such as finish damage or misuse․
Keep your proof of purchase; it’s essential for filing a claim․ Warranties typically don’t cover shipping costs for returns or replacements․
Registering Your Crib
Registering your 4-in-1 crib is crucial for safety recalls and warranty claims․ Manufacturers use registration information to notify owners of potential hazards or updates․ This process usually involves completing an online form with your purchase details and contact information․
Retain a copy of your registration confirmation for your records, alongside your proof of purchase․
Customer Support Resources
Manufacturer websites and online forums provide valuable assistance, offering FAQs, troubleshooting tips, and a community for sharing experiences with your 4-in-1 crib․
Manufacturer’s Website
The manufacturer’s website is your primary resource for detailed information regarding your specific 4-in-1 crib model․ Expect to find downloadable instruction manuals, replacement parts ordering options, and frequently asked questions addressing common assembly or conversion challenges; Many sites also feature helpful video tutorials demonstrating each stage of the process, from initial setup to transitioning between crib, toddler bed, daybed, and full-size configurations․ Direct contact information for customer support teams is usually readily available, offering personalized assistance when needed․
Online Forums and Communities
Online forums and parenting communities provide a valuable platform to connect with other parents who have experience assembling and converting the same 4-in-1 crib model․ These spaces often contain shared tips, troubleshooting advice for tricky steps, and insights into potential issues․ Users frequently post photos and videos, offering visual guidance beyond the official instructions․ It’s a great resource for peer-to-peer support and finding solutions to unique challenges․